
Search for answers or browse our knowledge base.
How do I create a shift in the Roster Schedule?
Overview
This article walks through creating a shift in FlowLogic from start to finish, including billing, staff assignment, and travel.
Opening the Roster
Head to the Roster Schedule in the bottom-left corner of the screen. The roster will load in either staff view or client view depending on your profile preferences — you can switch between the two at any time using the toggle in the top-left corner.
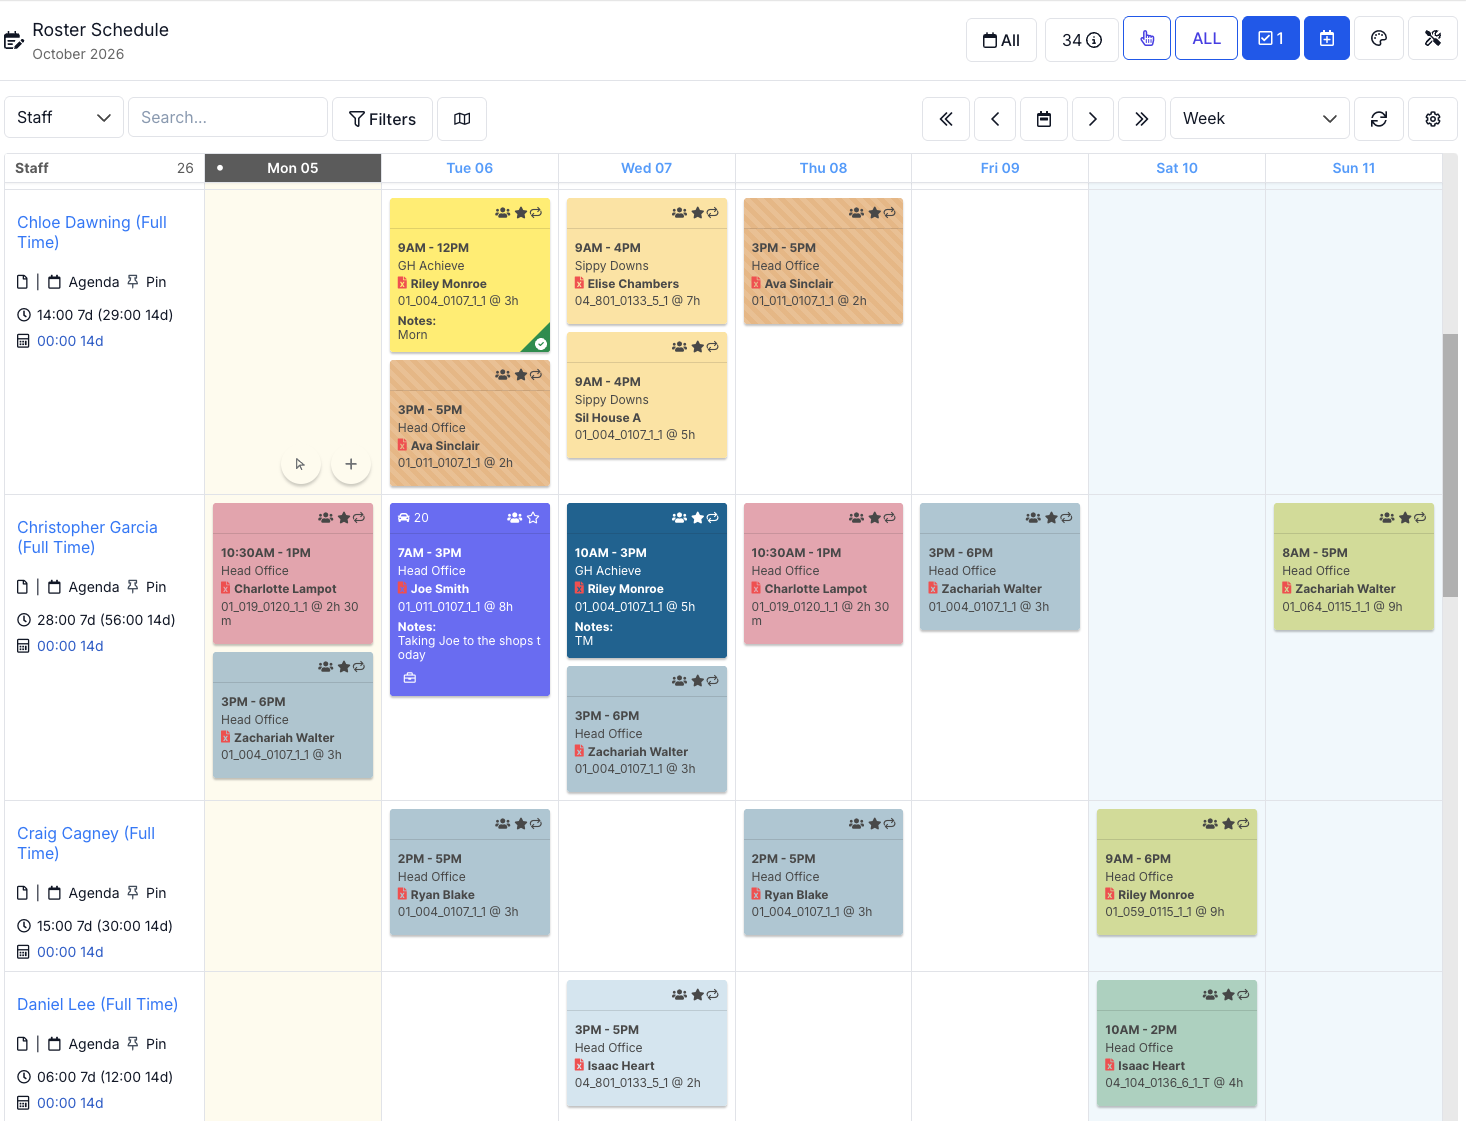
Most organisations find it easier to roster from the client view, but both options are available. Once you’re in the right view, search for a specific client or staff member, use the filter options at the top, or scroll through the list.
Creating the Shift
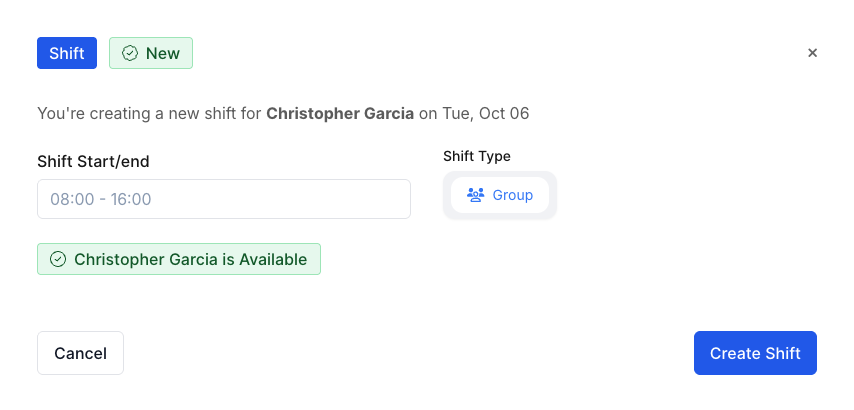
Find the date you want in the roster grid and either click anywhere in that cell or tap the + symbol in the bottom-right corner. This opens the time selection screen where you can set the start and end times in either 12-hour or 24-hour format. If using 12-hour time, make sure to include AM or PM. Once you’re happy with the times, click Create Shift.
The Shift Modal
You’ll be taken to the shift modal where all shift details are configured.
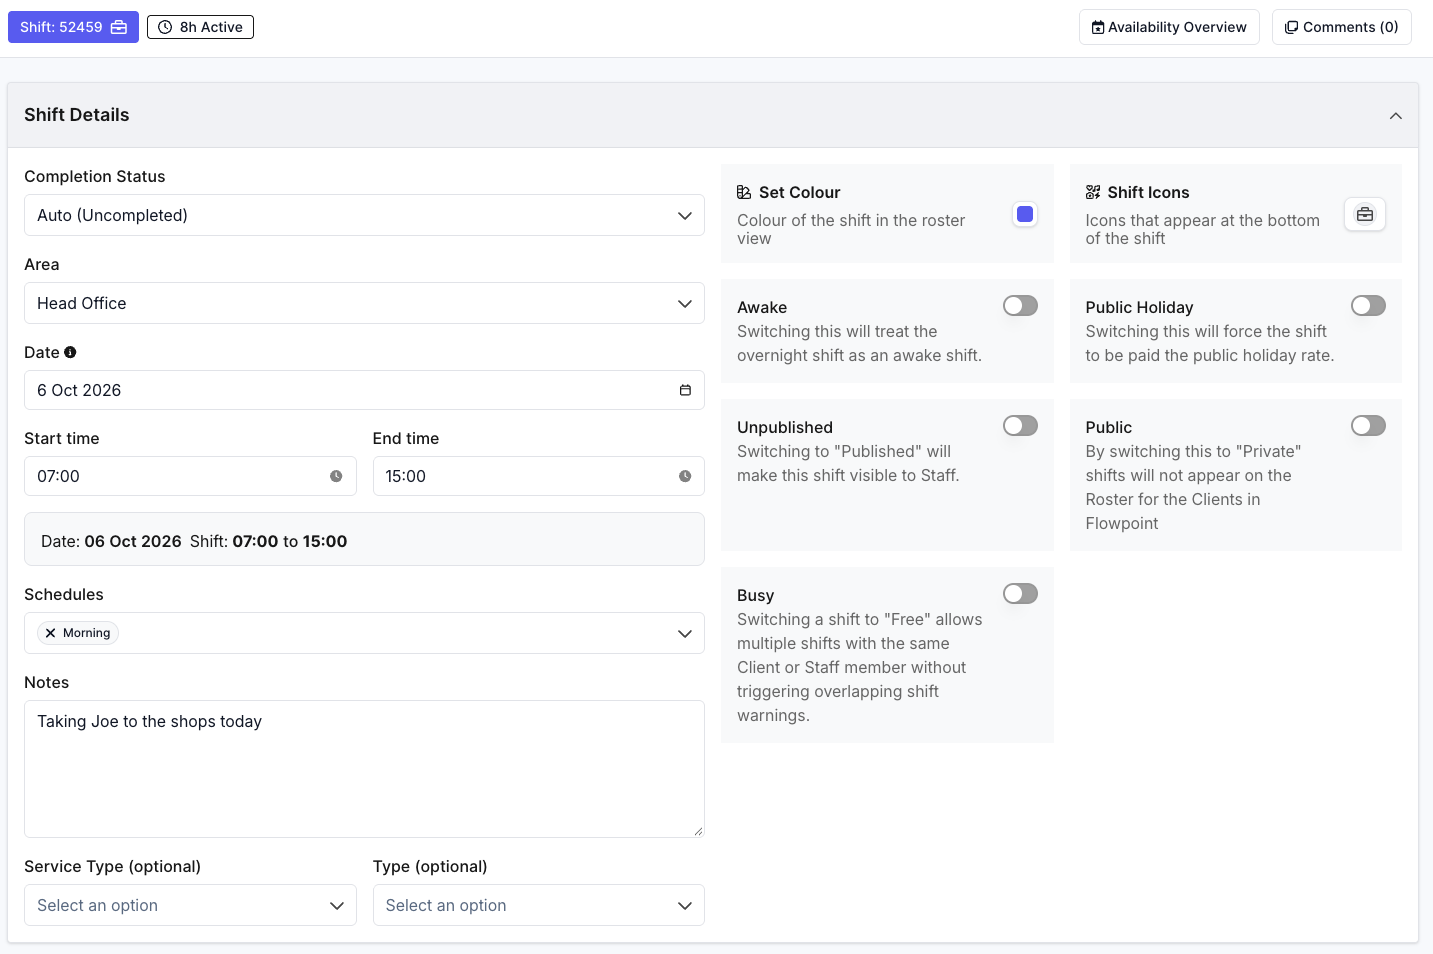
At the top of the screen you can see the shift status, active hours, and an availability overview showing the client’s roster of care and any overlapping staff availability.
Comments – use this section for internal notes between the rostering team. This is the right place for admin context or recording changes, as these notes are not visible to support workers.
Shift details – shows the area, date, and times you entered. Click any field to adjust it and the active hours at the top will update in real time.
Status – shifts default to uncompleted. This can update automatically when a timesheet is submitted and approved, or you can change it manually.
Schedules – assign a predefined schedule or label to categorise shifts by service type, program, or any other grouping that suits your organisation.
Notes – use this field for information the support worker needs, such as tasks or places to visit. These notes are visible to staff, so keep admin context in the Comments section instead.
Roster fields – two additional customisable fields are available to capture extra information such as program type, funding stream, or reference numbers. These can be set up as dropdowns or free-text fields.
Colours and icons – assign these to help visually organise the roster so staff can identify shift types at a glance without opening each one.
Overnight shifts – mark a shift as a sleepover or awake shift to determine how it is paid.
Additional toggles:
- Public Holiday – can be switched on manually or set to apply automatically
- Published / Unpublished – controls whether the shift is visible to staff
- Public / Private – determines whether the shift appears in FlowPoint, the external client portal
- Busy / Free – useful for on-call shifts where hours shouldn’t count toward scheduled totals
Adding Billing
In the Clients section you’ll see the client listed with a prompt to add billables. Click Add Billables to begin.
From here you can set the billing flag, adjust the ratio for group shifts (leaving it blank defaults to one-to-one), and choose whether the billing quantity is measured in hours or units.
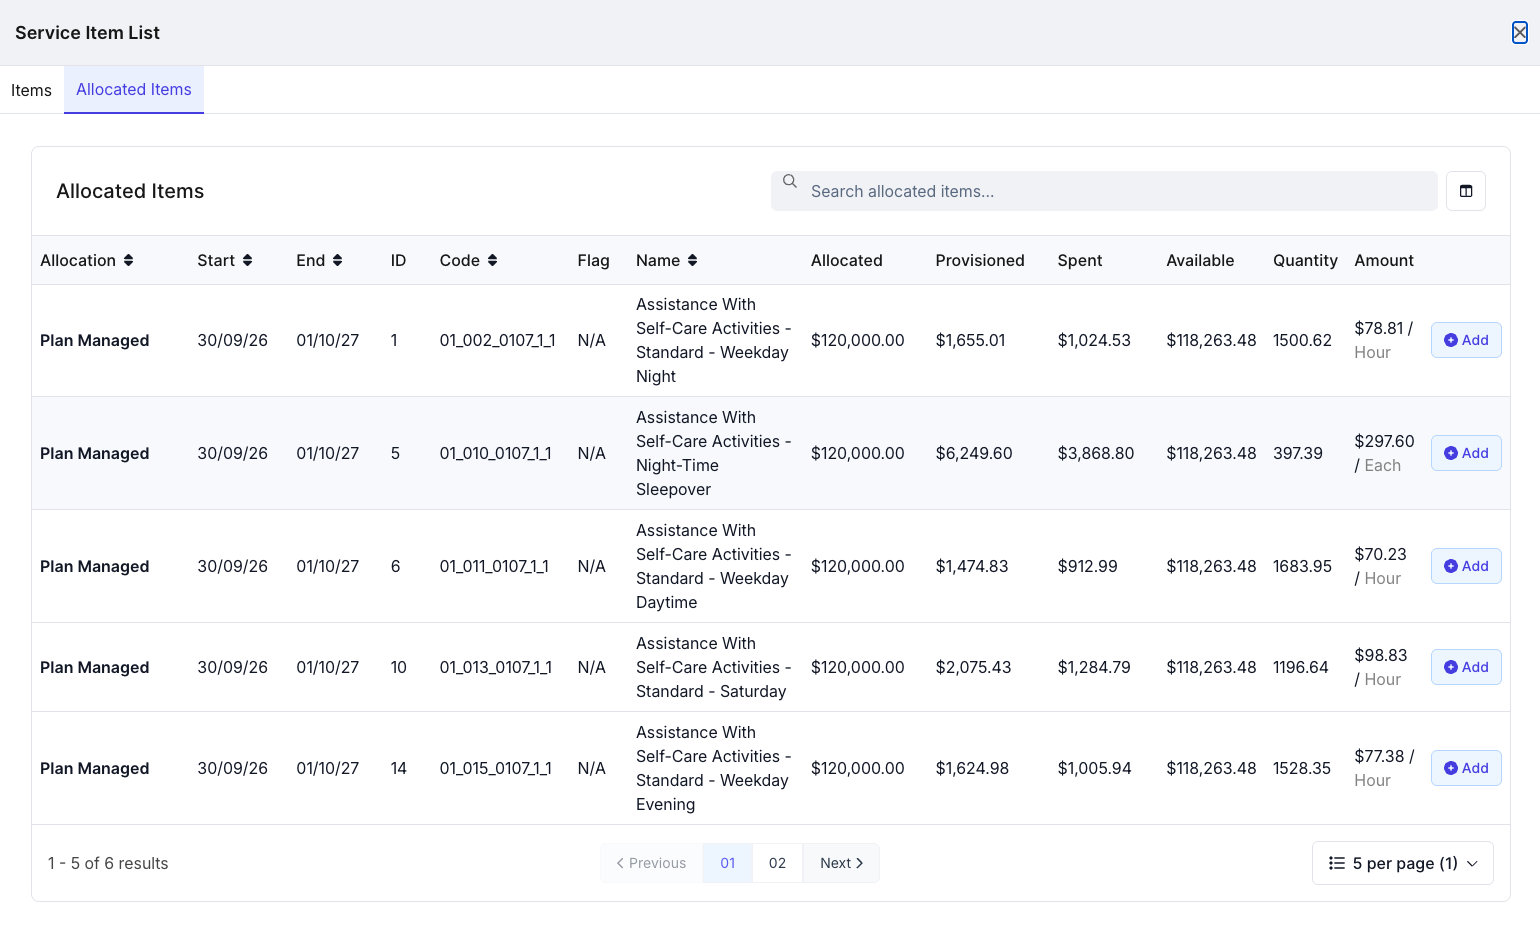
Click Change Service Item to select a billing item from the client’s allocated funding. You can search or scroll through the list and view available balances before selecting. More than one billable can be added to a shift, and more than one client can be included if needed.
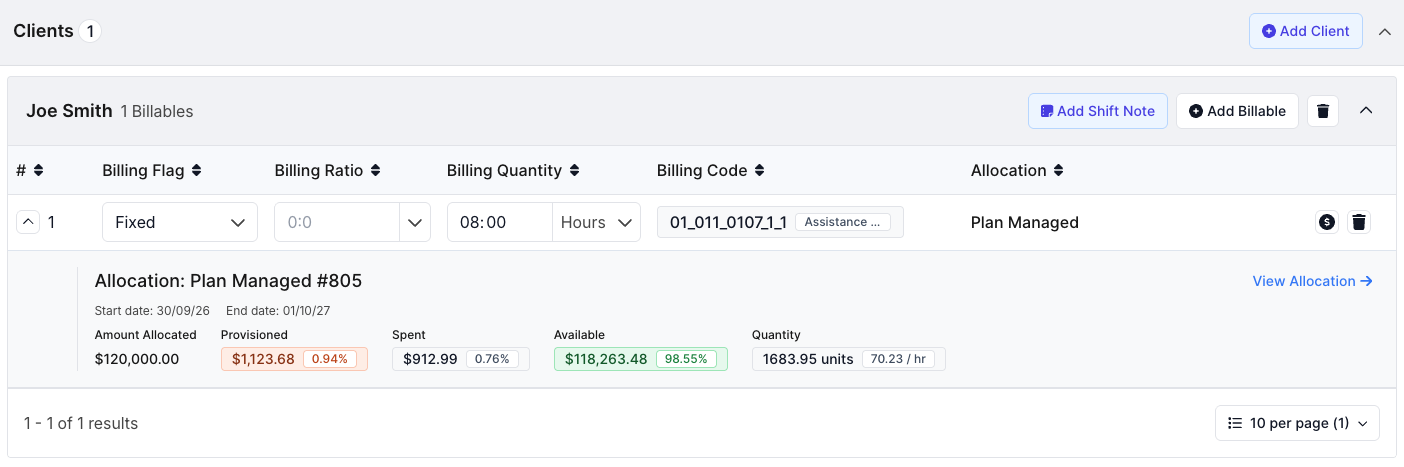
The small dropdown arrow on the left of each billing item shows full allocation details including plan dates, amounts allocated, spent, and remaining. You can also jump directly to the allocation from here.
Adding Staff
Scroll to the Staff section and open the drawer on the right. Tabs show available staff, overlapping staff, and staff currently on leave. Each person displays their cost category, current status, and a preferability rating based on how frequently they’ve worked with that client. This rating can be adjusted manually if needed.
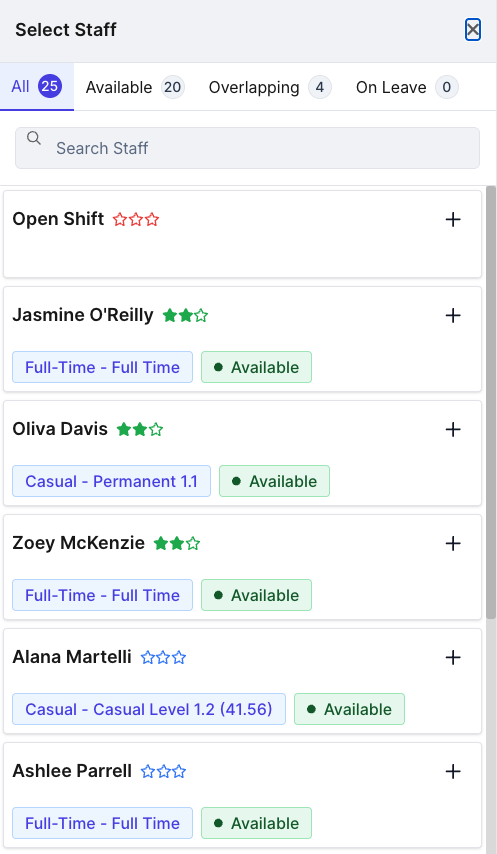
Once a staff member is added you can see their hours across the day, week, and fortnight, and add breaks or adjust their pay level if multiple pay grades are configured.
Adding Travel
In the Travel and Transport section, click Add in the top-right corner to open the travel drawer. You can record the destination, purpose, vehicle, and kilometres. Distinguishing between a personal and company vehicle is important as this determines how travel is reimbursed.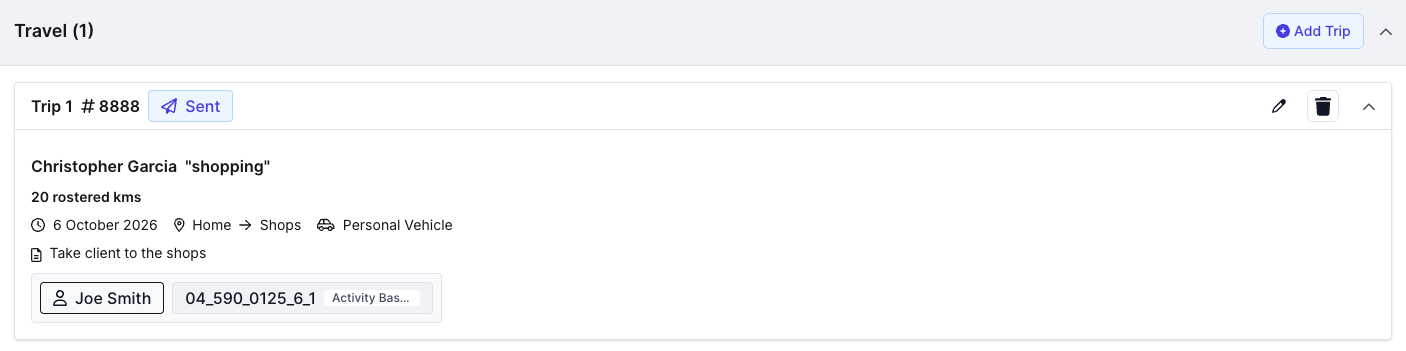
Staff can enter odometer start and end readings or total kilometres, and can upload supporting documents such as odometer photos or parking receipts directly from the app. More than one client can be added to a travel entry, and transport trips can include quantities and a billing code.
Saving the Shift
When everything is configured, click Save in the bottom-right corner. The system will run validation checks against the client’s roster of care and flag any warnings that need to be addressed. Once confirmed, the shift will appear on the roster.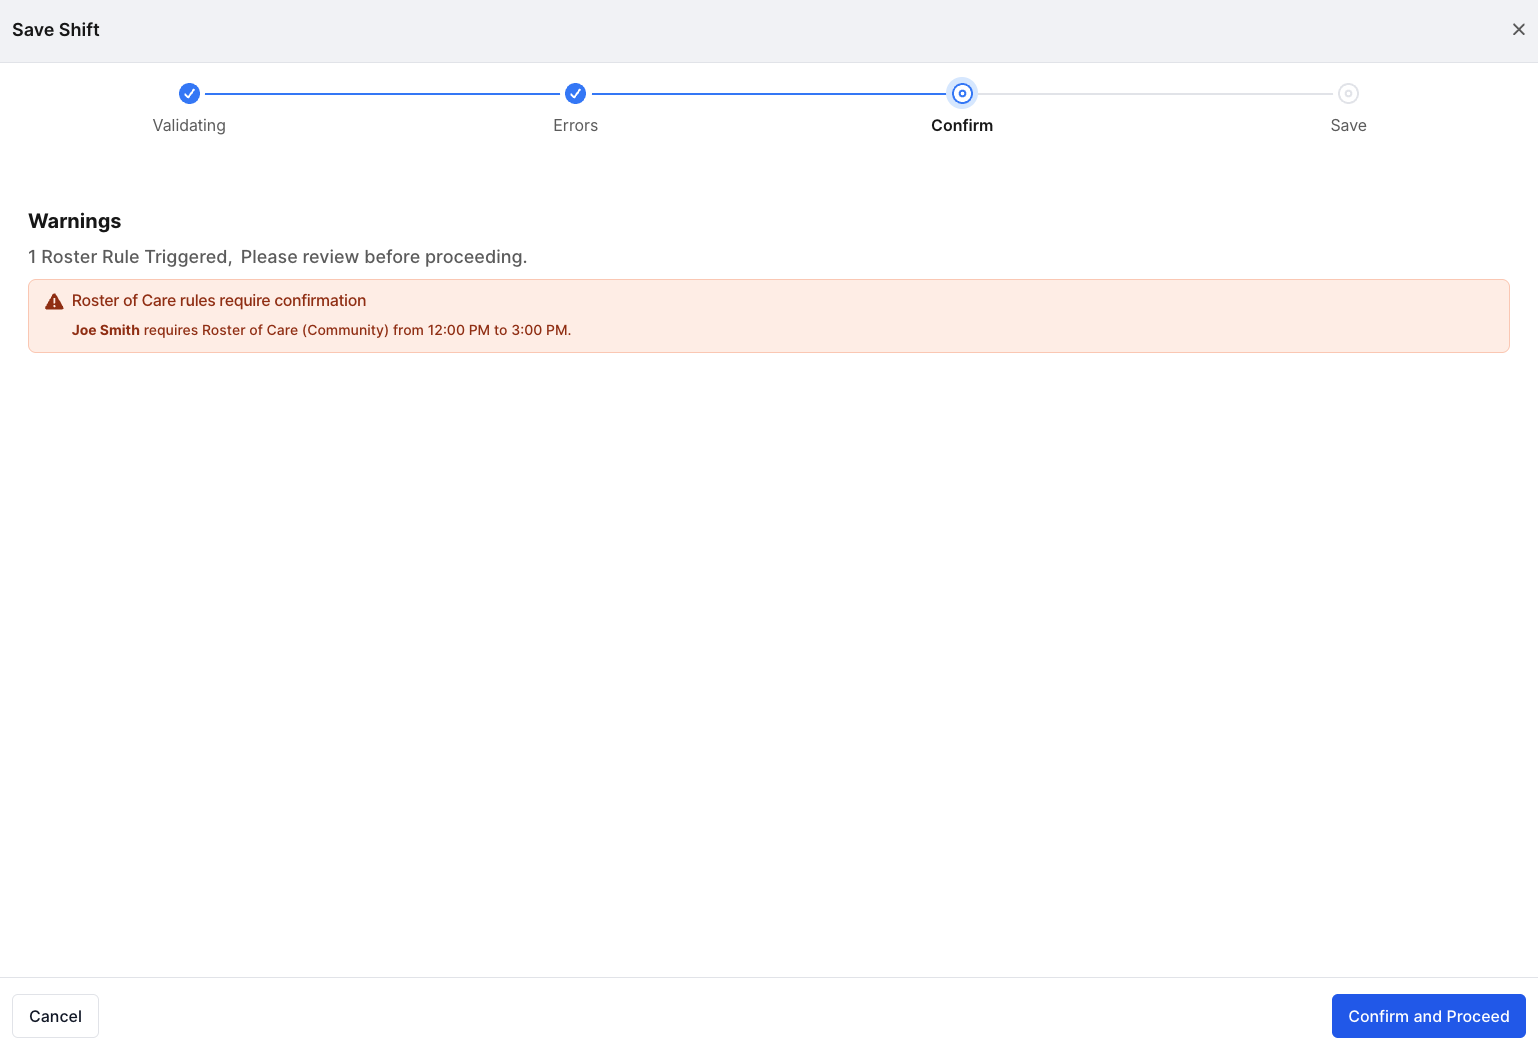
To make changes after the shift is created, simply click on it in the roster to reopen the shift modal.