How can we help?

Welcome to our Support Portal. Search for answers using the search box below,
or create a support ticket if you cannot find your answer.

< All Topics
Print

Multi Factor Authentication (2FA) User Experience

Setting up Authentication App for Multi Factor Authentication

To setup 2FA Authentication for FlowLogic on a mobile device, follow the below steps:

1 – Using a web browser (Google Chrome recommended)  navigate to your instance of FlowLogic, as shown below:


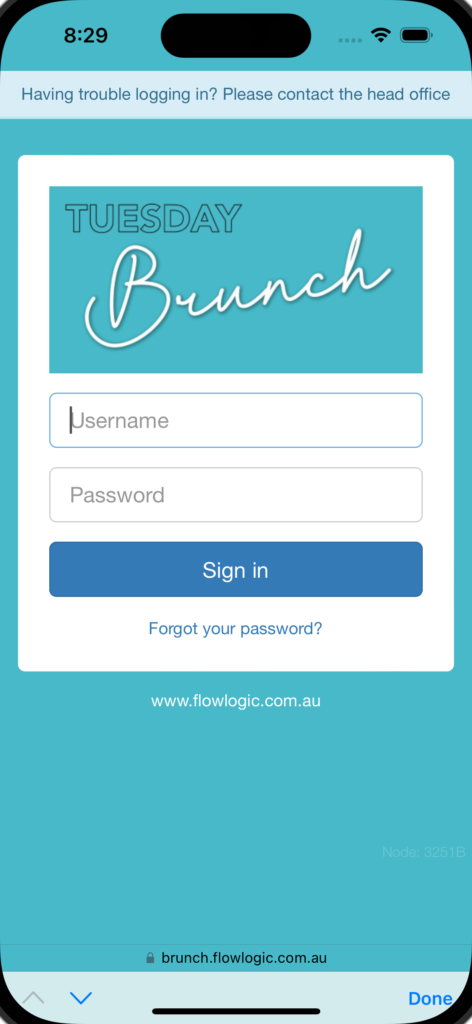
2 – Sign in using the usual Username and Password you have been provided by your organisation, and if successful you will be prompted to setup the Multi Factor Authentication. Example as below:


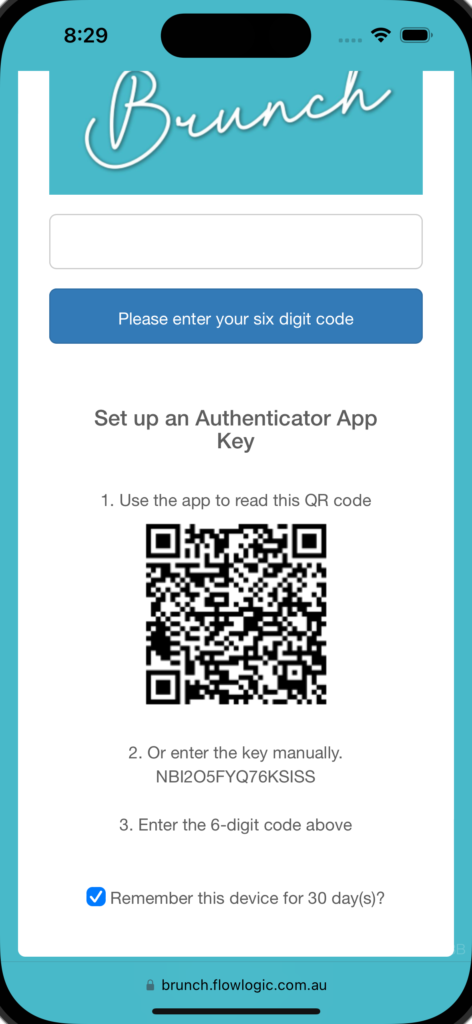
3 – If you are using a desktop computer or tablet, you can then scan the QR code displayed with either Microsoft Authenticator or Google Authenticator to authenticate the device.

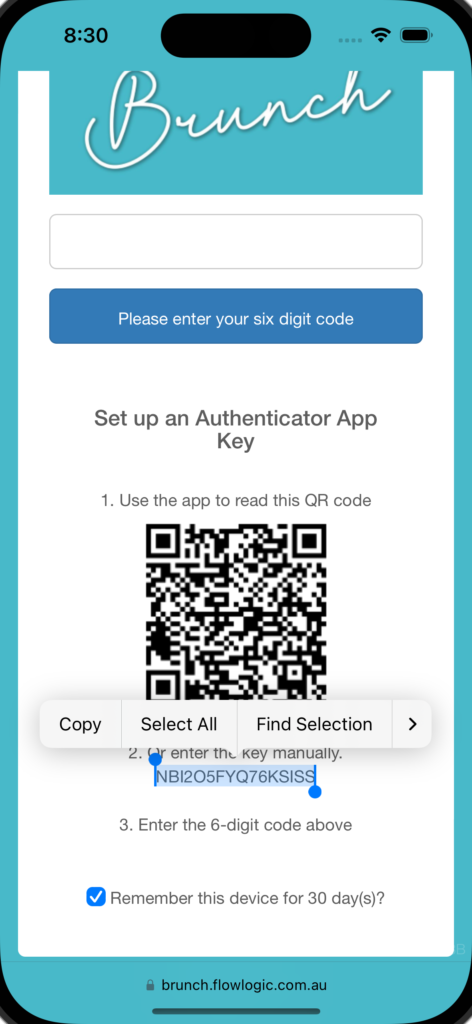
If you are using the same mobile device to authenticate and access FlowLogic, you can click and hold the key from step 2 above to copy it and paste it into a manually created entry in your Authentication App, as shown below:

Manually adding a FlowLogic Account to the Microsoft Authenticator App

  1. On your mobile device, open the Microsoft Authenticator app.

  2. In the Accounts screen, tap Add account.

  3. Tap Other account (Google, Facebook, etc.).

  4. If a prompt appears asking to allow the app to take pictures and to record video, tap Allow.

  5. Scan the QR code.

  6. If you are unable to scan the QR code, perform the following steps:

    1. Tap OR ENTER CODE MANUALLY.

    2. In the Account name box, enter a display name for your FlowLogic account.

    3. In the Secret key box, enter the key provided on the login screen.

  7. Tap Finish.

Manually adding a FlowLogic Account to the Google Authenticator App

  1. From your device, open the Google Authenticator app.

  2. Tap +.

  3. Tap Enter a setup key.

  4. Enter the following details:

    • A name for the account, for example, FlowLogic

    • The secret key provided on the login screen.

  5. Verify that the key type is time based.

  6. Tap Add.

Table of Contents